Google AdSense

Amazon Ad

Friday, April 30, 2004

The Amsterdam (50 guns) in 1654

This is another listing from the "Staet van Oorlogh te Water voor den Jaere 1654". The captain was a veteran of the First Anglo-Dutch War, who had served in Michiel De Ruyter's squadron-sized fleet at the Battle of Plymouth. The Amsterdam was one of the larger ships built as part of the First Anglo-Dutch War building program. What is noteworthy here, is that we list the armament, and separately note brass and iron guns.


The Amsterdam had an extremely long service life, as she was finally lost when she was captured by the French in 1689. She fought through the Second and Third Anglo-Dutch Wars, and was only lost during the War of the English Succession.


While she only carried 50 guns, early in her life, she later carried as many as 60 guns. This is the armament in 1654.


Admiralty:

Amsterdam

Ship:

Amsterdam

Date:

1653

Captain:

Jan Gideonsz. Verburch

Guns:

50

Length:

140 feet

Beam:

34 feet

Hold:

14 feet

Brass Guns:

4-18pdr, 4-12pdr, 6-6pdr

Iron Guns:

18-18pdr, 6-12pdr, 12-8pdr


Thursday, April 29, 2004

Why would we be interested in "lasts"?

There are lists of Dutch ships for the period 1628-1633 (and later) that only have "last" figures. If we want to put together fleets for gaming the Battle of the Downs, in 1639, we would want to know the ship sizes. The lists have a mix of detail, but they include crew and armament data for many ships. To use those ships in games, we would want to estimate their size, given the lasts figures. That is especially important because to calculate the English tonnage figure, we need to have estimates of the Dutch dimensions, first. The English burden is calculated as follows:

Burden in tons = (Length of the keel x Beam x Beam/2)/94. This gives you a gross tonnage. Privateers Bounty and other game systems generally base their ship capabilities on this figure.

A good approximation for converting Dutch measurements to English is:

English Keel Length = Dutch length from stem to stern / 1.33

English beam outside of planking = Dutch beam inside of planking / 1.13.

English depth in hold = Dutch hold / 1.13

This is approximate, but it is a starting point. Individual ships varied, but this is a good average. I have used the information from Dr. Weber's book on the Four Days Battle for Dutch ships taken by the English as the basis for these conversion factors. For many ships, he has the English and the Dutch measurements. Frank Fox helped him correct the English dimensions to fix copyist mistakes.

The Eendracht of 1639

If you are familiar with the First Anglo-Dutch War in the Mediterranean, you might be aware of the Noorderkwartier ship, the Eendracht (Unity or Concord). The Eendracht, at the time of the Battle of the Sound, in 1658, carried 38 guns and had a crew of 125 sailors. During the First Anglo-Dutch War, she had carried as many as 41 guns and had a crew of 140 or so.

The Eendracht as built at Enkhuizen in 1639. Ron van Maanen says that the dimensions were 130-132ft x 32ft x 12ft. The deck height, above the main deck, was 7 feet. If you have read my paper about calculating "lasts" (the Dutch gross tonnage figure from the first part of the century) (LastsCalculated), you will understand my interest in seeing the size of the Eendracht in lasts. Ron van Maanen says that the measurement was 300 lasts. I would disagree with that figure. For example, the flagships Aemelia (57 guns) and Brederode (54-59 guns) were 300 lasts, and they were much larger ships. I would guess that the Eendracht was about 220 lasts. I base that on my calculation: lasts = length x beam x hold / K. In this case, it would 220 lasts = 132 x 32 x 12 / 230.4, which is very plausible.

Wednesday, April 28, 2004

Tactics for Privateers Bounty (again)

I remember that the tactics that seemed to be working for me, earlier, when commanding the Dutch, was to have a broad column attempt to break the English formation, and to sail back and forth, between the two parts. Especially if the break divided the English into different sized parts, the smaller part would tend to be written down fairly quickly.

Tuesday, April 27, 2004

More tactics

So how do you win, when running a Privateers Bounty scenario? It is almost a separate issue from whether you are controlling the Dutch or English, although the English have great advantages, if you are in control against an autonomous Dutch fleet. If you have the nerve, you can "break the Dutch line", although, typically, they will just be spread out, not in a strict line ahead.

In any case, due to peculiarities about how Privateers Bounty simulates sailing ships, your fleet is going to spread out, dispite having a single line formation set, with close spacing. The problem is that the ships have different speeds and turning ability. That alone will cause ships to spread out, especially as you maneuver your fleet.

You can control individual ships, but I find that is only feasible with small numbers. When 40-ship fleets, you must maneuver them as a group, just to be able to exercise the positive control needed to reduce your losses and to inflict the maximum losses on the enemy. I prefer to tack back and forth, always turing downwind, if possible. It is possible, if you have sufficient momentum, to turn past the wind, but it is too easy to get caught, bow on, into the wind. If you do, you have big trouble. The thing to do is to immediately turn your helm 60-90 degrees, and hope for the best.

Monday, April 26, 2004

It is only in Privateers Bounty that no quarter was asked or given

That may not even be quite accurate, as ships may "surrender" but everyone keeps shooting at them! It seems not possible, with so many ships, to do "manual firing", so we seem to be reduced to letting ships blast away, on "automatic". In the real world, of course, ships would surrender, and that would mean something. Typically, because there was a cash incentive for taking prizes, the captors would want to board and take possession.

One point that I thought of, today, is that in the real First Anglo-Dutch War, the Dutch typically towed disable ships, while I don't think that is possible in the simulation. It would be great if it were, but I haven't figured out how to do it, if it is possible. For example, for the last two days of the Battle of Portland, Michiel De Ruyter's ship was towed.

Sunday, April 25, 2004

New Battle of Plymouth experiment

I just posted pictures and results from a simulation run for the Battle of Plymouth scenario where I increased the Dutch crew effectivenes and decreased that for the English. Let's just say that the English still won, because demi-cannon and culverins beat 12-pdrs and 8-pdrs, any day!

English survivors after winning at Plymouth

This shows the effect of a battle where no quarter is asked or given. The battered Success looks quite similar to the drawing of the Dutch Brederode being repaired after being battered at Dungeness (see Brederode after Dungeness).

You might ask "so how did the experiment work out?"

Yes, I ran the Battle of Monte Cristo simulation with the crew effectiveness increased for the Dutch and reduced for the Engish. For the English, this is not so farfetched. After Monte Cristo, the crew of Richard Badiley's flagship was at the point of mutiny. They wanted to scuttle the ship and escape.

The first time I adjusted the crew effectiveness, the Dutch did well, but the Paragon still was still able to survive all Dutch attacks and to inflict severe damage on them. After that, I further reduced the crew effectiveness for the Paragon. When I ran the simulation again, using my current tactics of maneuvering the fleet as a unit, with the helm, and the Dutch obliterated the English. In any case, the Dutch were stronger than the English. In the actual battle, the Paragon was able to repel all Dutch attacks. We only know, after the fact, how close the crew was to breaking and running.

I don't know if you know of Greg Costikyan

I was just reading the latest posting from Greg Cotikyan's blog. He tells the story of attending the first game design class (that we know about) at SPI in 1972. I discovered his website and then his blog from doing a Google search, some time ago (Games*Design*Art*Culture). What I am impressed by is that he takes time to answer e-mail from people like me, who are only "wannabe" game designers. Not only did Greg attend that class, but he went on to make a career in "gaming".

I still want to run a test where I manipulate crew "goodness"

I still hypothesize that by manipulating the crew ability, that it might be possible to make the English weaker and the Dutch stronger, to better portray the actual performance in the First Anglo-Dutch War. I just manipulated the crew value for the Battle of Monte Cristo, so that the Dutch were "good" and the English were "mediocre". Perhaps you English would object, but I am struggling to explain why the English did not obliterate the Dutch in the war. Instead, it was only in 1653 that the Dutch took even 10% losses in battles. I would appreciate alternate explanations.

Saturday, April 24, 2004

The interesting thing about the last simulation run was the Dutch tactics

This last simulator run was significant, in that it was a case where the Dutch were maneuvered back and forth on opposite tacks, heading as close into the wind as possible, without getting caught pointing directly into the wind. That did happen once, but the Dutch quickly recovered, by steering 90 degrees to starboard.

I started the battle with the Dutch in a single group. I maneuvered strictly with destination points. That did not seem to be giving them an edge, so I switched to maneuvering, using the helm. In this case, I challenged the English by sailing through them. I paid close attention to opportunities for raking. For much of the battle, the Dutch had a large group of mobile ships that could sail with all sails set, and sweeping back and forth through the English. In this particular case, the Dutch ended with 1.6:1.0 superiority. It night had not fallen, it could have been a bigger victory, potentially.

Another thing that I could have done is to bring groups of Dutch ships back together quickly, after they had become dispersed. The benefit of that dispersal is that they had a pool of ships that were relatively undamaged, while the English were pretty badly damaged, as a group.

I just ran a Battle of the Kentish Knock simulation

I ran an experiment with the Battle of the Kentish Knock. The Dutch won, as they had 45% left, while the English were reduced to 26% of their starting force. The battle ended with nightfall. I was actually shocked to find that the Dutch came out as well as they did. I maneuvered as a single group, until almost the end. The Dutch were so dispersed, that I formed three groups, so that I could maneuver the separated groups towards each other. After doing that, night fell, and I shut down the simulator, after noting the statistics and taking two photographs. The photographs are not very sharp, but they seem worth posting.

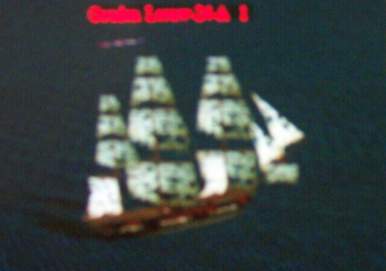
The Dutch Gouden Leeuw after the Battle of the Kentish Knock

This is the Dutch frigate, the Gouden Leeuw (24 guns), still very mobile, although with riddled sails.

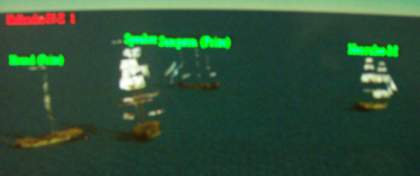
The defeated English survivors after the Battle of the Kentish Knock

Thisis the English survivors after the Battle of the Kentish Knock. The remaining ships were very badly damaged. The ships include the Hound, with only the mainmast standing, the Speaker, the Sampson (Prize), and the Hercules (M). These include most of the English ships that were still mobile. Dutch ships can be seen in the distance. Note that I caught them just at dusk.

Friday, April 23, 2004

Another battle report: Plymouth

I ran three quick Battle of Plymouth simulations. The first two were a disaster for the Dutch. I did not use a formation and controlled the fleet with the helm. I kept sailing back and forth, on opposite tacks, and cut through the English. The Dutch were almost annihilated.

The last time, I set a line formation. I kept a distance from the English, and sailed back and forth, on opposite tacks, firing all the while. As I reported on AngloDutchWarsBlog.com, the Dutch were winning, something like 75% to 68%. I also posted a new picture that showed a devastated English fleet.

Thursday, April 22, 2004

Battle report: the Battle of Portland (again)

I ran a quick Battle of Portland scenario on the simulator. That is a (kind of) nice feature. You can set the speed slide to the right, and the ships will move quickly. If you do that, you must be there, at the controls, all the time. I ran the scenario, again, with the Dutch in a single group, and controlled with the helm, not destination points. I used the same tactics, to sail back and forth, on opposite tacks, and hope for the best. This time, that was a disaster. Probably the biggest thing I did that caused a problem was to "mix it up" with the English. I let the English get in among the Dutch, and hit them with demi-cannon and culverin fire. If I had been content to sail off into the distance, the result would not have been so bad. Instead, "I kept coming back for more", and suffered the consequences. I ended the battle, before the Dutch lost their last ships.

What didn't help the outcome, any, was that I got involved in a duel between the Dutch East Indiaman Vogelstruis and the English 3rd Rate Worcester. I sailed the Vogelstruis in S-turns in front of the Worcester, to try and rake her, repeatedly. While I got engrossed in the duel, the rest of the situation collapsed. When I realized that, I quit the simulation run.

Even more Privateers Bounty tactics

I have found that when I try to take "hands off" the Dutch, when running my First Anglo-Dutch Wars scenarios, the English will start to win. As soon as I start maneuvering the Dutch as a fleet, the Dutch will improve. If their losses and damage are not too great, they will even start to win. The only concern is to not waste ships trying to kill English 1st and 2nd Rates that are dismasted or otherwise heavily damaged. The only way to kill them is to rake them from both ends, mercilessly, and stay out of their field of fire. Doing so is only practical in a "fight to the last ship" (if that can be said to be practical).

Fighting First Anglo-Dutch War battles

I believe very much, and this is based on considerable experience with Privateers Bounty, that maneuvering your fleet, as a unit, is very beneficial. In my last run of Battle of Portland, the Dutch had much of the effect of a line formation without actually forming up that way. I also went back to my "old ways", where I emulated 1653 tactics of making "passes" that broke the enemy formation. In this case, the "enemy formation" was pretty much a "blob". Anytime you are organized and fighting a "blob", you can do well. I have stopped using "destination points" (at least largely), and have gone back to maneuvering with the "helm". The problem is that "destination points" don't actually dictate the rudder setting, and can cause ships to head directly into the wind (a very bad thing). When you do "helm" controlling, you can usually avoid this, to your great benefit.

Wednesday, April 21, 2004

I just hung my computer, running Privateers Bounty

I was having a great time, running the Dutch fleet at the Battle of Portland (the scenario). I had the entire fleet as "group 1" (CTRL-1) and had set the formation to "Custom formation", which simply means that the ships are grouped, but not in a line. I maneuvered strictly using the helm. After a short while, I had set the sails to "Full". I sailed the Dutch fleet back and forth, being careful to always turn downwind, except for one time that I had been caught directly into the wind. I quickly recovered and was back to the same tactics.

It seemed like I was not inflicting much damage, although the Victory was totally dismasted. I specifically steered to regain the weather gauge and to sail as far North as possible, to further damage the Victory. As it didn't seem to be having much effect, I headed South. I continued to have the Dutch fleet in something liike a line, except that I never had set that formation. To do so would be contrary to history. There is some reason to believe that the Dutch tried to fight in a line, at Scheveningen, after seeing the English fight at the Gabbard.

The battle seemed to be going really well (97% to 97%) when my machine hung. It was so badly hung that hitting the "windows" key didn't pop me back to windows. I had a small amount of control over the mouse, but not so much that I could do anything. I ended up having to do a hard reboot. I was disappointed, but there was nothing to be done. The basic problem was that I had not rebooted after running the simulator for a number of runs. Even though I am using Windows XP, you must run Privateers Bounty in Win98/ME compatibility mode. Therefore, you have the usual memory leak problems.

The big question is why the English didn't do better

After many simulator runs for First Anglo-Dutch War scenarios, the burning question is why the English diidn't do better in the war. In the simulation runs, the English are very strong. If I run the English, rather than the Dutch, I can almost annihilate the Dutch. So why didn't that happen in the real war?

I can think of two reasons that could at least partly explain the situation. One reason is the great disorder of the fleet and the lack of tactical control exercised by Robert Blake. The other explanation is just a tentative theory, at this time. I read this on a webpage discussing the Revenge in her last battle. That page noted that the crew was largely pressed from London and Southeast England, and that the Elizabethan commanders didn't think much of crews so composed.

I propose, as an experiment, to lower the English crew ratings, to see how that might affect the results. Dutch captains and crews were also extremely variable. Some hired ships, captained by their owners, were very suspect. However, for the sake of experiment, I will test my theory. If the Dutch do better, that would suggest that there is some substance to my theory. I will keep you "posted".

Tuesday, April 20, 2004

I just posted Battle of the Sound pictures

I ran the Battle of the Sound scenario on the simulator, tonight, and took some pictures. The Dutch goal is to run six transports past the Swedish fleet, to reinforce and supply the besieged Danish capital, Copenhagen. A secondary purpose is to inflict as much damage as possible on the Swedish fleet, while keeping the Dutch fleet largely intact.

For this simulation run, I used the irregular formation for the Dutch. I only maneuvered the fleet with the rudder, rather than destination points. For the last half of the battle, I ran the Dutch fleet at full sail. If I had not deliberately gone back to try and finish off the Swedish fleet, the Dutch would have had about a 2:1 superiority, which is amazing to me, given the Swedish superiority in ships. The Swedes had two large ships of 72 and 74 guns (the Viktoria and Kronan).

The pictures are all posted at anglodutchwarsblog.com

General-at-Sea

Putting together fleets for experimenting with Iain Stanford's rules, General-at-Sea is still on my to-do list. My schedule has been hammered by external events for the last three weeks, so that has so far not progressed very far.

The plan is to take my existing ship drawings (sideviews) and reduce them to 1/3200 scale and put three to a game piece, with text on the back. I intend to try a variant suggested by Iain, where the values are calculated from real broadside weights, crew numbers, and burden in tons. We could hope that would give more accurate capabilities than basing the figures on rate and number of guns.

I previously had still been calculating ship values for games based on a modified version proposed by Paul Hague in his book from 1980:

  • Hull damage value = English burden / 3
  • Fire power = broadside weight / 20
  • Boarding value = crew / 4
  • If anyone has contacts with Akella, I would appreciate your help

    I have been unsuccessful in getting a response from Akella (developer of Privateers Bounty). If someone has a connection with them, I would appreciate your making the case as to why we would be worth contacting.

    What we would like to do (or at least I would like to do) is to do a version that is tailored for 17th Century naval wargaming. To do that, I would propose the following:

  • Increase the number of ships that can entered to a very large number (perhaps as large as 250, although you would need a very hot computer to do that)
  • Add 17th Century ship 3-D models
  • Add 3-D models for Northern Europe and the Mediterranean
  • Allow a formation to be preset, during setup
  • A new one: perhaps allow a user to control ships from both sides, to better accomodate solo gaming
  • I finally have all the photos posted from last weekend

    This morning, on anglodutchwarsblog.com, I posted the rest of the photos from running the Battle of the Kentish Knock scenario in the Privateers Bounty simulator. I thought that they were useful, as they give a good flavor of the experience. As this and other battles were fought as melees, I think that they also give an impression of what the actual battle was like. Admittedly, the land background is not real, but we presently do not have a way to add better landscape 3-D models.

    What I would like, would be able to license the technology from (Akella, so we could fix the shortcomings. Greg Costikyan, the big time game developer, thought this would be worthwhile. We could even let them market the product, as a way to make them more open to our desire.

    Monday, April 19, 2004

    My Anglo-Dutch Wars (2) site is relaunched

    I have added a link to the site where I will be posting many pictures. The name is AngloDutchWarsBlog.com. I have put several more pictures, and will be adding more, plus commentary on them. Of course it is also another venue for content.

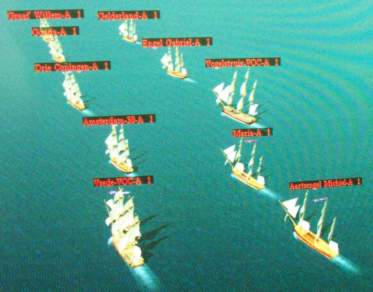
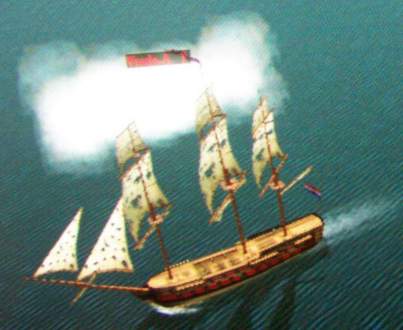
    The Amsterdam ship Maria at the Battle of the Kentish Knock

    The Amsterdam ship, Maria, was one of two Dutch ships lost at the Battle of the Kentish Knock. Interestingly enough, almost every time I run Privateers Bounty, for that scenario, the Maria is a casualty. I have a good picture, from the weekend, of the Maria, obviously in deep trouble, with a fire buring, and no foremast, and other damage. A large splash, just to starboard, must be a large caliber shot (32pdr?), while two smaller shot splashes are just beyond (perhaps demi-culverins).

    I have wondered at the explanation as to why the Maria keeps getting destroyed. I believe it has to do in its place in its squadron, and in the English squadron that is the most obvious to attack. The Maria was in Michiel De Ruyter's squadron, and was commanded by Claes Sael. She carried about 30 guns, the largest of which were probably 12pdrs. She was not very large, and carried a crew of about 100 sailors and soldiers.

    When we look at the English fleet, with two 1st Rates, several 2nd and 3rd Rates (such as the Andrew, Triumph, and Speaker), the logical question is why the Dutch weren't more badly beaten. The only other Dutch loss, besides the Maria, the Noorderkwartier 24-gun ship, the Burcht van Alkmaar, the English results seem pretty meager. I suspect that the answer is that Blake was not interested in tactics. Michael Baumber paints Blake as someone who believes that the combatant with the strongest will, will triumph, and that nothing else matters. Blake had enough concern about the tactical situation to slow, to allow the others to catch up, but that is about his limit.

    Sunday, April 18, 2004

    I have what are essentially action war shots from the Battle of the Kentish Knock

    I have some really good photography from the Battle of the Kentish Knock scenario in Privateers Bounty. They remind me of action shots from World War II in the Pacific, from combat photographers. In this case, they are from the First Anglo-Dutch War!

    I believe that these pictures will be published on AngloDutchWarsBlog.com. I hope to get a revised site up quite soon. I have sufficient space for higher quality pictures than I can publish from Blogger.

    For example, there are two pictures. One shows the large armed merchantman, the London, relatively undamaged, approaching Cornelis Evertsen's ship, the Wapen van Holland, to attack. To the right, is the Warwick, minus formast, and obviously in trouble. The next picture shows the Warwick quickly sinking, with the Hound, a Dutch prize, alongside. The Hound is visibly damaged, but still has all three masts. I would not have thought that this quality of photography possible from a computer screen (admittedly they are not great).

    The revised English and Dutch lists are now available on the AgeOfSail Yahoo Group

    I have uploaded revised lists for the English and Dutch ships that I have used to date in my First Anglo-Dutch War scenarios for the Privateers Bounty scenario. The main advantage of these two lists is that they are alphabetical, rather than the random order of the previous files. I had to do some Smalltalk programming, to revise my file processor, to produce a filtered, alphabetic list. I don't have anything like the English list, so I believe it will be valuable for producing "game pieces" for Iain Stanford's General-at-Sea rules.

    I will reformat the English and Dutch lists to be alphabetical

    I'm sorry to say that the lists that I uploaded to the AgeOfSail Yahoo Group "Files" are in some order known only to Privateers Bounty. I realized how I can regenerate the list and, with some work, produce alphabetically ordered lists. Otherwise, they are useless. I'm not sure how many people are interested, but I am, at least, so I would be helping myself.

    Saturday, April 17, 2004

    I finally extracted my English ship definitions for the First Anglo-Dutch War

    I wrote a program to parse the Privateers Bounty usrships.ini file that has user ship definitions. I have extracted both my Dutch and English ship definitions. They are currently available on the AgeOfSail Yahoo Group. The English ship definitions are the most useful, as that information is not otherwise available. I directly entered them into Privateers Bounty, rather than having Excel spreadsheets or Word documents. What is uploaded are both formatted Word documents.

    Friday, April 16, 2004

    More Privateers Bounty tests: The Battle of the Kentish Knock

    As I was concentrating on the battle, I did not take any more pictures, but this last simulation run was noteworthy. I ran the Battle of the Kentish Knock with my revised setup, better reflecting the actual ship positions at the start of the battle, and the Dutch did well.

    Historically, at the start, the Dutch were sailing westward. I grouped the entire Dutch fleet together (CTRL-1, after selecting them all). I then set the formation to be the single line. Then, I set a new position point way to the East. I did not bother to try to turn them downwind. Instead, I let the simulation turn them. What happened is that they turned towards the wind, essentially tacking, and this allowed the leading English ships to close.

    I believe that many English ships were still headed towards the Dutch, while they rapidly formed up, heading East. That let the Dutch "cross the T", pretty much. In any case, they kept sailing East, without changing course. Several ships were caught behind, so I adjusted their sails to be fully set, rather than in "battle mode". That enabled them to break free and start to escape. The only English ship in pursuit, far to the East, was the 3rd Rate Speaker.

    When I shut the simulation down, the Dutch still had 97% of their ships while the English were reduced to 90% of their ships. This was actually a more realistic style battle, in that it was not a "fight to the finish".

    More pictures from Portland and Plymouth

    I have more pictures (plus I reduced the others to more manageable size). I ran the Battle of Plymouth scenario, and at the ending point, when the Dutch were sailing off to the East, up the Channel, leaving the English behind, each side was reduced to 86% of their starting size.

    Jan Gideonszoon Verhaeff's squadron at Plymouth

    Jan Gideonszoon Verhaeff's squadron at Plymouth, shown forming into a rough line (probably inaccurately).

    Gideon De Wildt's flagship for the war, the Vrede, shown at Portland

    Gideon De Wildt's flagship, the 44-gun Amsterdam ship, the Vrede.

    The English charging the Dutch at Plymouth with the Rainbow near the lead

    The English in full charge towards the Dutch at Plymouth, with the large ship near the lead being Sir George Ayscue's ship, the Rainbow.

    Thursday, April 15, 2004

    Pictures from the Battle of Portland scenario

    These pictures are pretty large, but they don't reduce well. These are close up pictures taken from the monitor while Privateers Bounty was running the Battle of Portland scenario. Sadly, the 3-D models are late 18th Century, not 17th Century, but you can use your imagination!

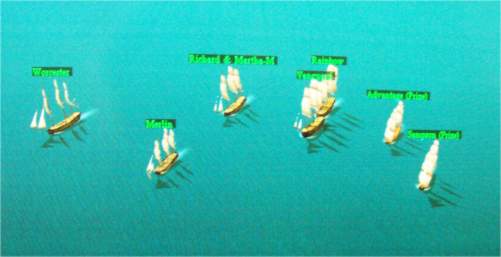
    George Monck's squadron at the Battle of Portland

    This picture shows a portion of George Monck's squadron at the Battle of Portland.


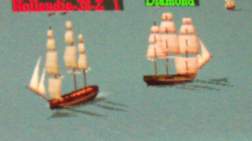
    This picture shows Jan Evertsen's flagship, Hollandia (38 guns) at the Battle of Portland, on the opposite tack from the English Diamond.

    More Privateers Bounty simulation runs

    After some research, I adjusted the positions that I had given both the Dutch and the English, in my Battle of Portland scenario. I had two books open, to help me better see how the squadrons should have been positioned and what course they should have had.

    I ran the simulation, after that, and it was the case that the Dutch started off with an edge, as the relative positions dictated. If the Dutch would attempt to conduct a protracted fight, they would suffer. For a while, they seemed unable to damage English ships.

    Next, I ran the Battle of Dungeness scenario. A winning strategy was to keep the Dutch in line, keep them at "arms length" from the English, and sail back and forth, on opposite tacks. One thing not to do is to needlessly spend ships by letting the Triumph fire broadsides at close range (or any range, if it can be helped). The last English ship afloat, dismasted, was the Triumph. I made the mistake of trying to sail, in the line of fire, and attempt to wear down the Triumph. All I got for my trouble was as half-a-dozen sunk Dutch ships.

    Wednesday, April 14, 2004

    Testing scenarios

    I have been doing a great deal of testing of the scenarios that I have recently updated for the First Anglo-Dutch War. The most dramatic change is for the Battle of the Kentish Knock. There, the simulation plays out more like the real battle, so that the Dutch are competitive. The worst outcome was for the Battle of Portland. For whatever reason, George Monck's squadron is able to easily sail upwind to engage the Dutch. In reality, that was much more difficult and time consuming. I need to go back and study why the simulation is different from the battle.

    Sunday, April 11, 2004

    I have reworked most of the First Anglo-Dutch War scenarios

    After I got back from traveling, today, I reworked four scenarios:

  • Battle of Plymouth
  • Battle of the Kentish Knock
  • Battle of Dungeness
  • Battle of Portland (The Three Days Battle)

    The point is to change the position of ships and correct wind direction to better reflect what I now believe to be correct. I have factored in Michael Baumber's and Peter Padfield's analysis of those battles. They largely agree, so I have proceeded with that. Sadly, I am not surprised that Dr. Ballhausen's book has been discredited, yet again.

    I will supply the revised scenarios, upon e-mail request. That is simply because I don't have a good place to make them available through download. I have done some initial playtesting, and am satisfied that they reflect the real-life situation better than what I have previously had.

  • Thursday, April 08, 2004

    How the Battle of Plymouth simulation run ended

    At the end, the Vanguard surrendered, and the Dutch had 44% of their ships left. There were actually three substantial English ships left, surrendered, that could have been boarded and towed back to the Netherlands. They were the Vanguard, Rainbow, and the Prosperous of London. The last was the same ship that Michiel De Ruyter took in the first day of the real Battle of Portland. Sadly, it was later retaken by the English, as the Dutch position deteriorated.

    My theory about what happened may be only relevant to Privateers Bounty, but it seems if the Dutch can stay in a single line, tack back and forth, keep the English at a distance, they can do well. If a battle devolves into a chase, the English will pick off the Dutch stragglers. The thing NOT to do is to sail the Dutch line into the middle of an English massed group of ships.

    Back to Privateers Bounty

    This morning, I have been running Privateers Bounty, almost "hands off" with the Battle of Plymouth. I set the Dutch to have a single line formation, and then have been just sailing them back and forth, on opposite tacks, while I did other things. The result, so far, is that the Dutch have 50% left and the English have 4%, with the Vanguard as the only ship left, fighting. At this point, the Vanguard is all but dismasted, although is otherwise still able to fight. The Prosperous of London and the Rainbow are still afloat, but are surrendered.

    All that I have done with the Dutch is to keep the line formation, and use destionation points for the formation to control heading. I have been careful to never sail too close to the wind, and keep sailing back and forth, on opposite tacks. That has been sufficient to win, in this scenario. As I write this, the Vanguard is being "written off", gradually, as she accumulates increasing damage, as the remaining Dutch fleet sails past.

    Monday, April 05, 2004

    I will be reworking some scenarios

    Sadly, I will need to rework the First Anglo-Dutch War scenarios for Privateers Bounty. The issues are not the orders-of-battle, but simply the wind direction and ship placement. I have been digging out more information about the Battle of Portland (the "Three Days Battle"), and the consensus shows a different picture than that protrayed by Dr. Ballhausen.

    The main difference is that George Monck's squadron was actually very far downwind from the main English body, and farther yet, from the Dutch. It took a very long time for that squadron to beat their way upwind to join the battle.

    Thursday, April 01, 2004

    I am now working on the ship drawings that use the flags

    My current project (which is moving slowly), is to digitally draw ships to use with Iain Stanford's rules, General-at-Sea. You can follow my ongoing work over at Anglo-Dutch-Wars.blogspot.com. I have been updating the ship drawings, as I have proceeded. The goal is to make them as three-dimensional as possible, and to use the historically correct layout. I spoke with Frank Fox, yesterday, about the St. George and English 5th Rates. I have been using the Van de Velde drawings in Frank's book, A Distant Storm as a guide.

    Amazon Context Links